How to define roles, choose what each one permits, and keep the catalog of permissions.
For administrators who hold the permission manage roles.
How roles, permissions and grants fit together
- A permission allows one kind of action, such as
manage users. - A role is a named bundle of permissions, such as Billing manager.
- A role is granted to a person (see People) or to a group (see Groups), optionally until a date.
A member holds every permission of every role granted to them, directly or through their groups. Changing a role's permissions changes them for everyone who holds the role, from their next click.
The roles page
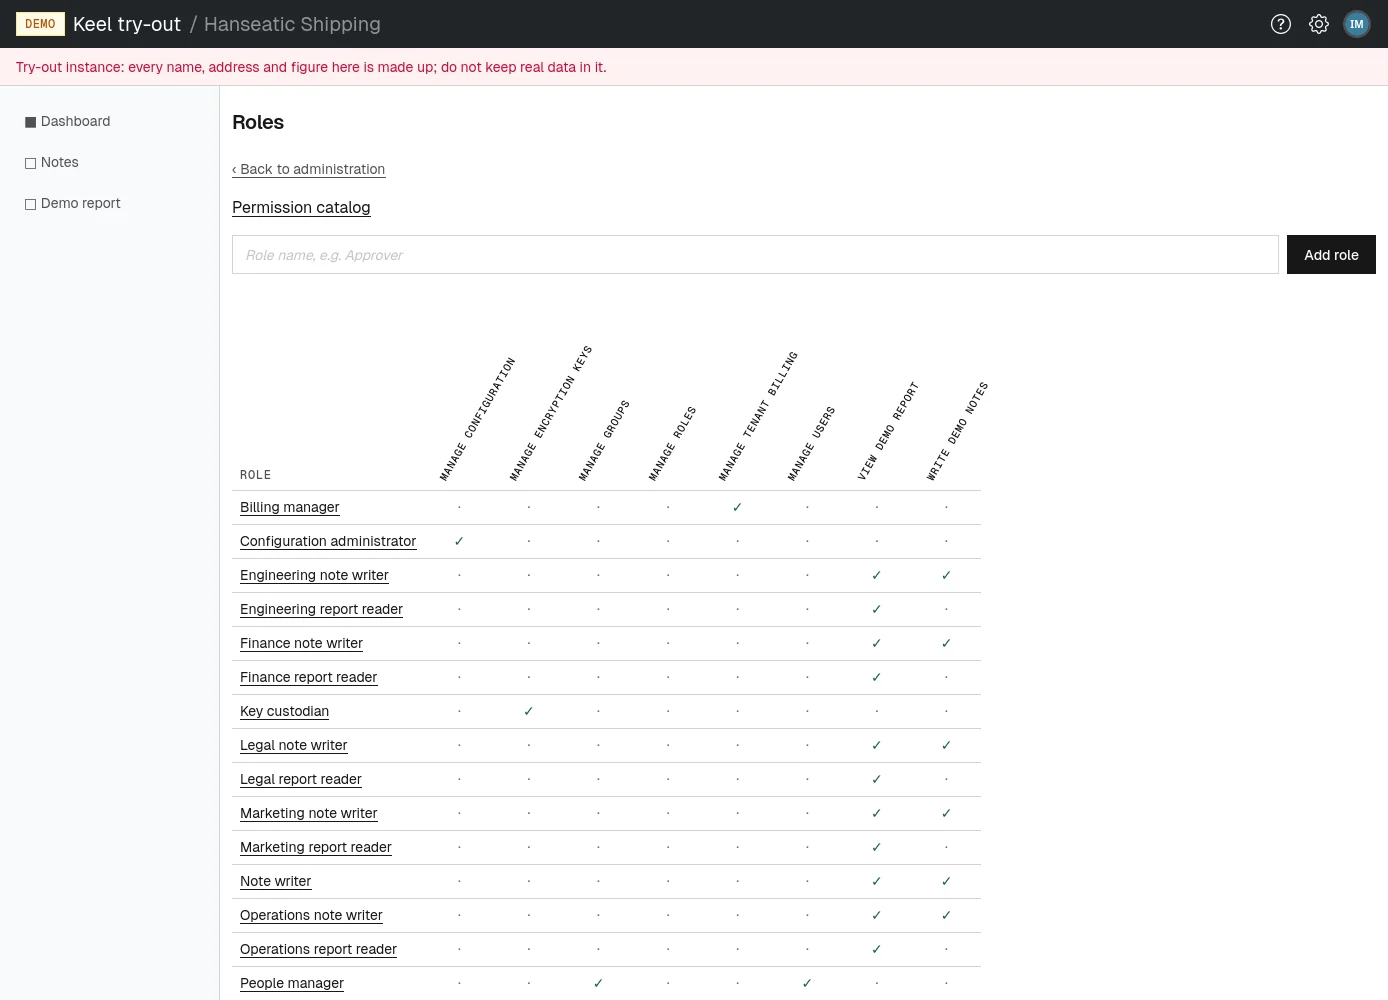
Open Roles and permissions from the administration page or the settings menu. The page, at /tenants/<your tenant>/admin/roles, shows every role as a row and every permission as a column, with a check mark where the role grants the permission. Point at a column heading to read the permission's description. Choose a role's name to open it.
The built-in permissions
| Permission | What it allows |
|---|---|
manage users | Manage users and the roles assigned to them. |
manage roles | Manage roles, the permissions they grant, and the custom permission catalog. |
manage groups | Manage groups, their members, and the roles granted to them. |
manage configuration | Change tenant-level configuration and settings. |
manage tenant billing | Manage the tenant's subscription and the billing details its invoices carry. |
manage encryption keys | Rotate the customer managed key and manage the tenant's encryption keys. |
The application your organization uses usually adds its own permissions, for example to read a report. They appear in the same matrix and are granted the same way.
Creating a role
- Type the role's name into the field at the top of the roles page, for example
Approver. - Choose Add role. The role appears in the matrix with no permissions.
- Choose the role's name to open it, and choose its permissions as described next.
Choosing a role's permissions
- Open the role from the roles page.
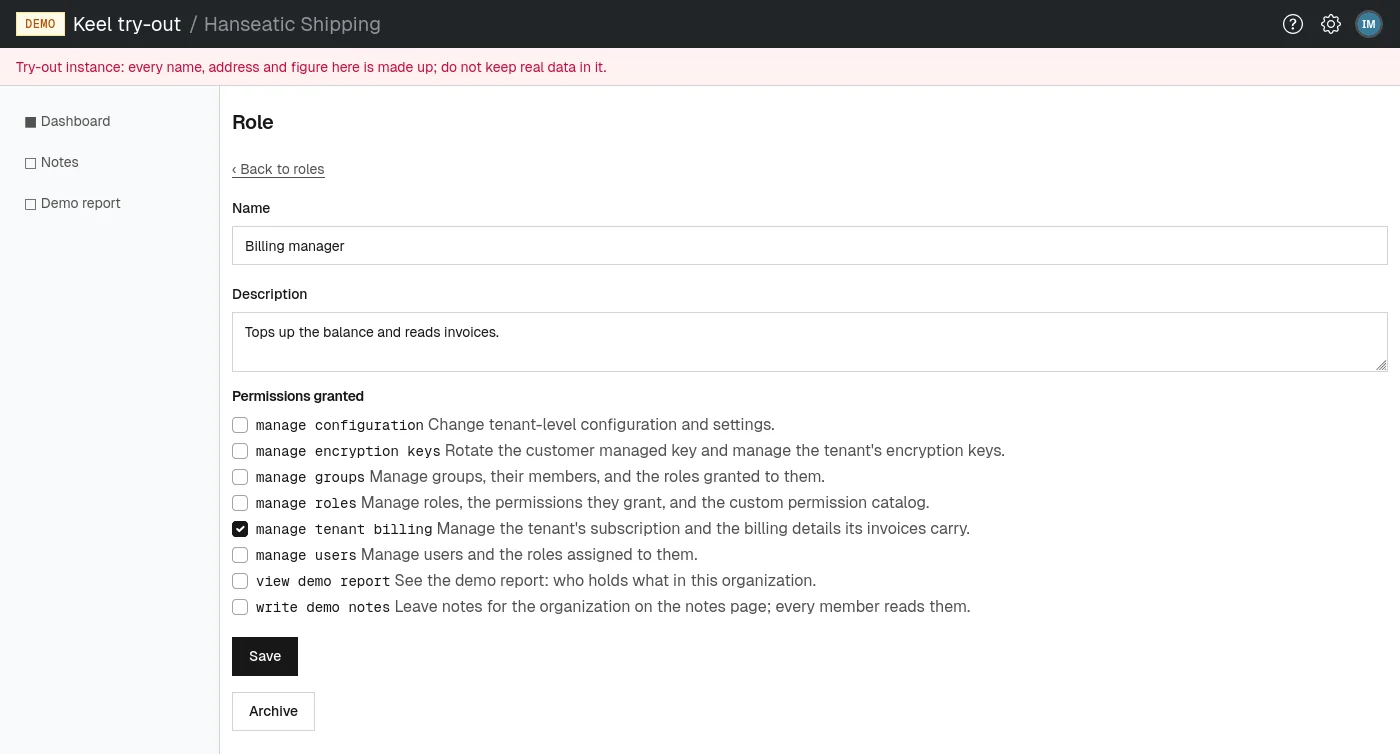
- Change Name if needed, and write a Description that says who the role is for.
- Under Permissions granted, tick each permission the role should give and untick the others. Each box shows the permission and its description.
- Choose Save. Everyone who holds the role gains or loses the changed permissions from their next click.
A change that would leave nobody in charge of the organization, or take access control away from you, is refused with a message at the top of the page.
Archiving a role
- Open the role and choose Archive at the bottom of the page.
The role disappears from the roles page, and nobody holds its permissions any longer, whether it was granted to them directly or through a group. The audit log keeps its history. Archiving is refused if it would leave nobody in charge of the organization.
The permission catalog and custom permissions
Choose Permission catalog on the roles page to see every permission with its Code, Description and Type: Built-in for those Keel Platform and your application provide, Custom for those your organization defined.
You can define custom permissions of your own, to bundle into roles like any other:
- Type a code into the first field, for example
export_data, and optionally a Description. - Choose Add custom permission. The permission appears in the catalog and as a column on the roles page.
For a custom permission, the catalog lets you edit the description (choose Save on its row) or retire it (choose Archive). Built-in permissions cannot be changed or archived.