How to gather members into groups, grant roles to a whole group at once, and keep the membership up to date.
For administrators who hold the permission manage groups.
Why use groups
A group is a set of members, such as a department or a team. A role granted to a group is held by every member of it, for as long as they belong. When someone joins the Finance department, adding them to the group Finance gives them everything Finance needs; when they leave it, removing them takes it all away. You do not have to grant and revoke roles person by person.
The list of groups
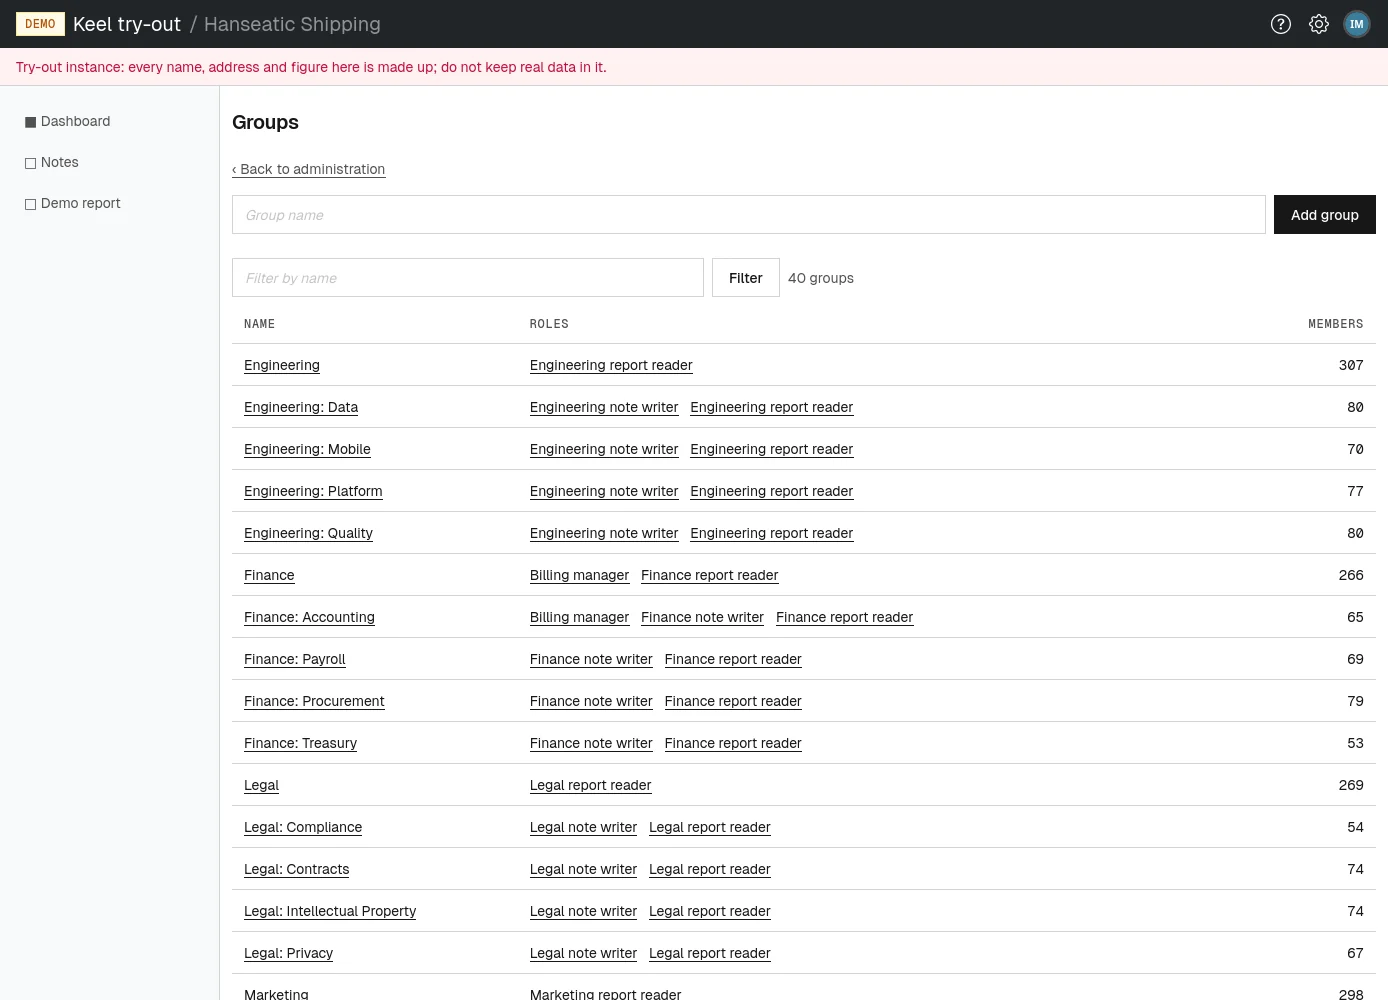
Open Groups from the administration page or the settings menu. The page, at /tenants/<your tenant>/admin/groups, lists each group with its Name, the Roles granted to it (each a link to the role's page) and its number of Members.
The list shows 50 groups to a page, with the number of groups beside the filter and Previous and Next under the list. To find a group, type part of its name into Filter by name and choose Filter.
Creating a group
- Type the name into Group name at the top of Groups.
- Choose Add group. The group appears in the list, with no roles and no members.
Open the group from the list to add members and roles.
Renaming a group and describing it
- On the group's page, change Name, and optionally write a Description.
- Choose Save. Members and roles are not affected.
Granting a role to a group
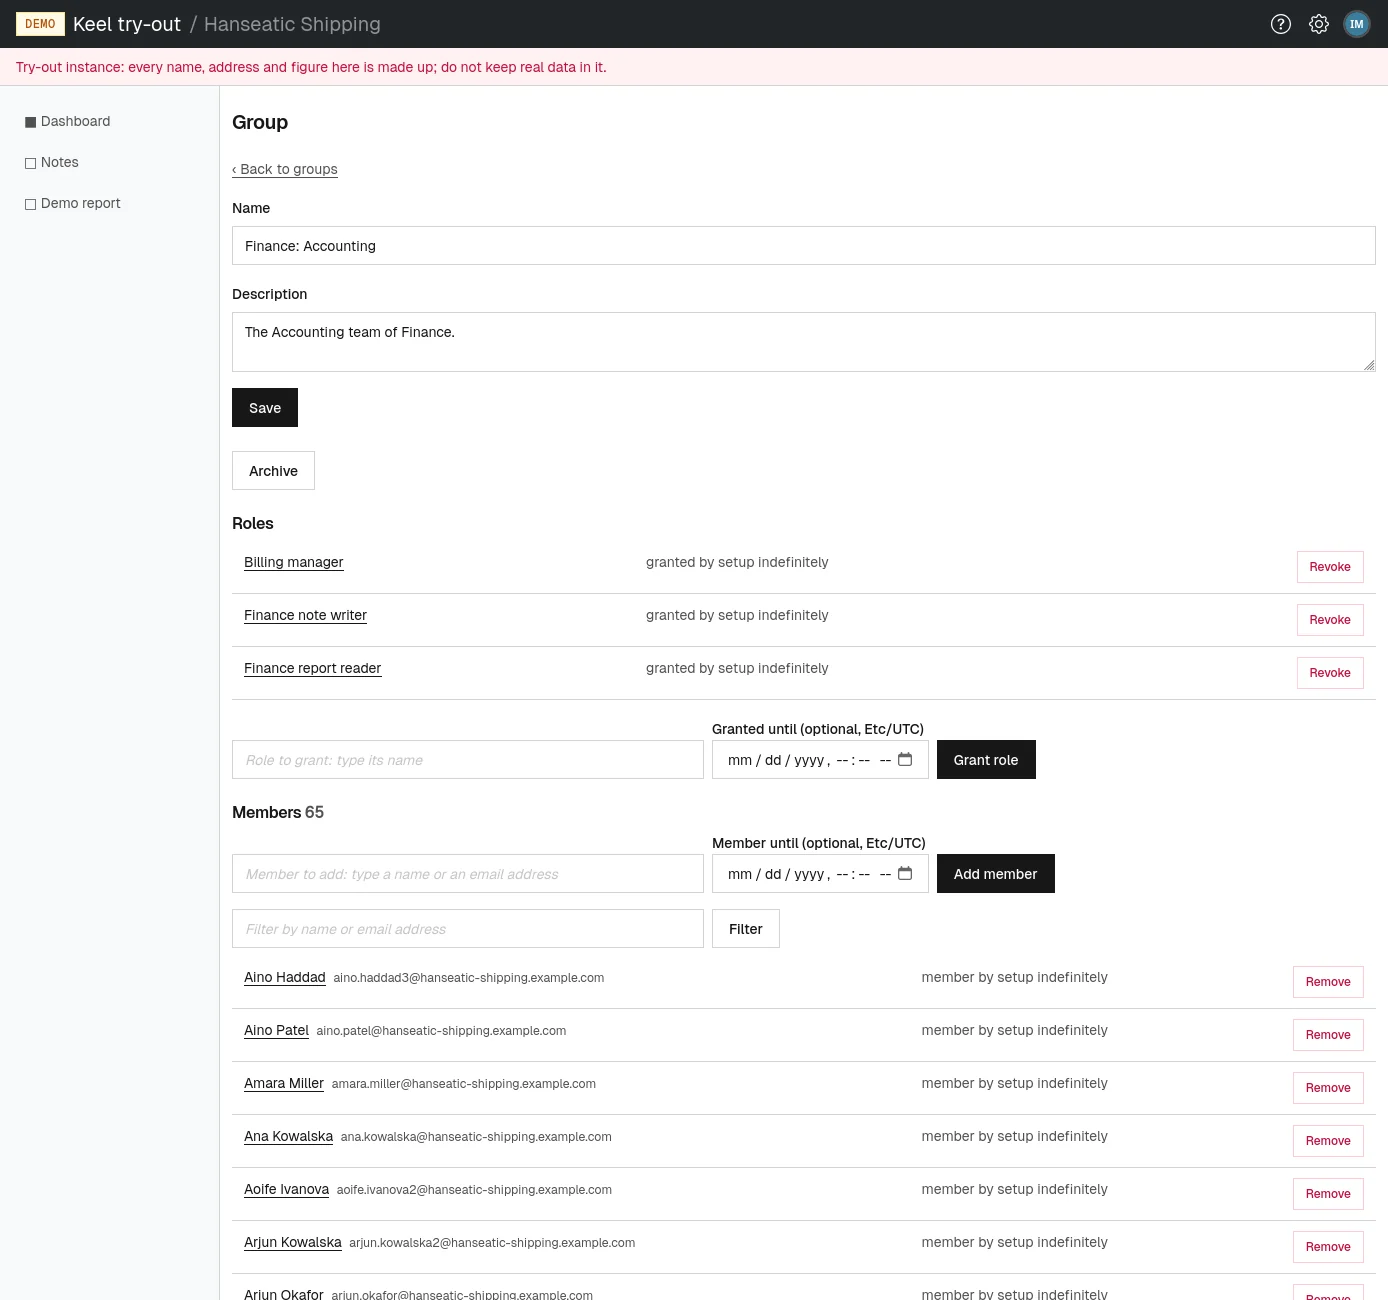
The Roles section of the group's page lists the roles granted to the group, each linked to the role's page, with who granted it and until when.
- In Role to grant: type its name, type part of the role's name and pick it from the suggestions.
- Optionally, set Granted until (in your organization's time zone). Leave it empty for no end.
- Choose Grant role. Every current member of the group holds the role from their next click, and so does everyone added later.
To take the role away from the group, choose Revoke beside it. Every member loses the role at once, unless they hold it some other way.
Adding and removing members
The Members heading shows how many members the group has.
- In Member to add: type a name or an email address, type part of the person's name or address and pick them from the suggestions.
- Optionally, set Member until to the date and time the membership should end.
- Choose Add member. The person appears in the list and holds the group's roles from their next click.
To remove someone, choose Remove beside their name. The membership ends at once and the person loses the group's roles. A membership with an end date ends by itself.
Each member row shows the person's name (a link to their page in People), their address, and since when, by whom and until when they belong. The list shows 50 members to a page; use Filter by name or email address to find one person in a large group.
A person's own page lists the groups they belong to, but you add and remove them here.
Archiving a group
Groups are never deleted. When a group is no longer needed, archive it.
- On the group's page, choose Archive.
The group disappears from the list, and its members stop holding the roles granted to it. The audit log keeps its history. Archiving is refused if it would leave nobody in charge of the organization (see Keeping someone in charge).
Groups managed by the identity provider
If your organization signs in through an identity provider, its configuration may name some groups in its mappings (see Mappings). Such a group's page says "This group is managed by the identity provider: members belong to it exactly while the provider says so, checked at each sign-in." It has no add form: the provider decides who belongs, and Keel Platform brings the membership up to date each time a member signs in. You can still grant and revoke the group's roles here.